Caravan Raiders’ Hideout unchained
This dungeon has been changed a fair bit compared to its original normal version (I’m not sure if the same changes have also been made to the normal level 80 version or just to the unchained level 85 version). Prince Abaddon, the fifth boss, has been replaced by a Demigod of Acheron; the shape of the tunnels has changed a bit, and a door has been added which now forces you to cycle through the dungeon in one particular direction and not in the opposite direction.
Blood for the Blood God
Each of the first four bosses here (Jathred, Medjian, Sethik, Vral), when his health drops to 10%, starts casting a spell called Blood for the Blood God. This does a (weak) aoe on the players, and at the end of the cast the boss kills himself and puts a debuff on all the players. This debuff is called X’s Ritual Mark, where X is the name of the boss. The debuff persists through death but it can be removed by going into the throne room where the Demigod of Acheron will appear later (or where Prince Abaddon used to appear in the original version of the dungeon; but there didn’t use to be a throne there before, IIRC).
If a player has all four debuffs on him, they are replaced by a single debuff (Acheronian Blood Ritual Mark), which has the same properties as all four individual debuffs put together. Having this new combined debuff allows a player to spawn the Demigod of Acheron by clicking the dinosaur head in the throne room.
However, the debuffs can be very annoying for actually fighting the other bosses; for example, Jathred’s Ritual Mark is a -50% received healing modifier, and you don’t really want e.g. your tanks to be tanking the remaining bosses with that. So what you should do is to have just one DPSer collecting these debuffs, while all the other players in your group go to the throne room after each fight to clear their debuffs.
If you kill a boss before he is finished casting Blood for the Blood God, you won’t get his corresponding debuff and thus you won’t be able to spawn the Demigod of Acheron.
Jathred the Life-Drinker
First phase: tank and spank the boss; he does physical damage; occasionally he runs up the slope and to the right, and starts channeling Sanguinary Revival. This heals him up quite quickly. To interrupt this heal, one of the players should run below the three little waterfalls of blood on the right side of the room. Once the player has done this, he can’t do it again in the same fight, so you should set up an order of doing this beforehand. Going below the blood streams also gives you a -20% received healing modifier, so you should put the tanks last in this order.
Note that when he runs up to start Sanguinary Revival for the first time, it’s likely that he is at 100% or nearly 100% health even before he starts casting Sanguinary Revival (because you didn’t have much time to DPS him and some of the adds might have put a heal on him as well). In that case there’s no point in interrupting this heal — better keep all players available to interrupt the heals later in the fight (as each group member can only do it once).
Second phase: starts when the boss reaches 35% health. Now he will spawn two adds every now and then; they are ranged and hit annoyingly hard, so the players should focus on tanking and killing them.
In this phase, you don’t tank or DPS the boss. Instead, the boss occasionally casts Mark of the Life Drinker on a randomly chosen player. He starts chasing this player around the room and if this player gets hit by the boss, the boss will heal up quite massively. So it’s important that the targeted player starts kiting the boss immediately and keeps a distance from him. Meanwhile other players should deal with the adds, especially because the adds can otherwise snare (and DPS) the kiter.
To make kiting easier, you can snare or root (but not stun) the boss during this phase.
A good way of kiting the boss is to run up the ramp and to the left, and then carefully jump down, to avoid taking too much fall damage and getting too long a snare from the fall.
In the second phase, you just have to focus on kiting him correctly (to prevent him healing up) and dealing with the adds; you don’t have to actually tank or DPS him as he’ll lose health automatically anyway.
Medjian the Unholy
This boss does magic damage, so tanks should wear protection gear. In fact it’s useful if everyone wears gear with lots of HP and possibly protection.
Frost Void = aoe attack centered on the boss; move away, out of the circle which you’ll see spawning on the ground.
Forgotten Soul = means that the boss will start spawning skulls. This is followed by one or more Soul Binder casts, each of which is targeted on a different random player.
For each Soul Binder, a skull spawns from one of the four sarcophaguses and starts following the player that was targeted by that Soul Binder cast. This player has to click the sarcophagus from which the skull emerged; this will despawn the skull.
If the player clicks any of the other sarcophaguses, he gets KB’ed. If the skull reaches him (or touches any other player), the boss heals up by about 10%, so it’s very important to avoid this. (Players touched by the skull also take some damage and receive a −100% unholy invulnerability debuff (Bound Soul).
So if you’re the one targeted by Soul Binder, it’s best to walk around the outer edges of the room, behind the sarcophaguses, until you reach the correct sarcophagus and click it. Don’t lead the skulls through the middle of the room (where the other players are tanking and spanking the boss meanwhile). Don’t waste too much time walking around while the skull is following you, as it eventually gets faster and faster and will catch up with you.
Ideally you should move near the entrance of the room when the boss starts casting Forgotten Soul; this way you’ll be a bit farther away from the sarcophaguses, which means you’ll have more time to start kiting the skull if it happens to target you.
Initially there’s just one skull, later the boss will spawn two or even three at a time. To make it easier to figure out which player has to click which sarcophagus, they are color-coded: the sarcophagus has a colored particle effect, and the player has a particle effect of the same color as the sarcophagus which he must click. The problem is that all these colors look like different shades of black, so they aren’t that easy to tell apart. Still, with a little practice, red and green are easy to recognize, and then of the remaining two you can easily tell yellow apart from black because yellow is lighter after all.
If you look from the entrance towards the boss, the sarcophagus colors are as follows: yellow = near right; black = near left; red = far left; green = far right.
Sethik Bloodblade
The boss stands in the middle of a room, surrounded by about 6 adds (I’ll call them dogs although I suspect they are really hyenas). Don’t charge the boss — that would activate all the dogs as well, and they are group mobs and will wipe you quickly. Instead, stay near the wide pillar at the entrance of the room and fight the boss there; pull him with Irritate.
Incapacitate Foe = frontal cone knockback, you can move out of the cone.
Capture = the boss targets a random player while casting this. The targeted player gets rooted and one of the dogs wakes up and locks its aggro on this player. So if the player is one of the squishies, he’ll have to kite the dog around the pillar. The root lasts 10 seconds, but it’s really a ruin (Capture Ruin) so you can remove with with Steadfast Faith. Various other anti-root abilities also work on it.
Order: Kill = when the boss casts this spell, the dog gets a +250% damage modifier and +50% hinder movement; so it will hit very hard, but on the other hand it will be easier to kite. A squishie gets one- or two-shotted by the dog when it gets buffed like this, so it’s best to just kite the dog all the time.
Order: To the Death = this seems to cause the dog to change its aggro lock to a different player.
So just kite the dogs and DPS them, and also DPS the boss meanwhile. He will wake up new dogs on a regular basis, so you should put enough DPS on the current dog to kill it before the next one is activated. On the other hand the boss also has an enrage timer (5 minutes), so don’t neglect DPS on him either.
Vral the Wrathful
The boss stands on a platform and you should stand on the same platform while fighting him (with one exception, on which more below), or you will take very heavy damage (probably some sort of retributive damage from his Ritualist’s Shield buff).
Invocation = activates some of the candles on the edge of the platform. These candles buff the boss’s DPS, so you should destroy them as quickly as possible. The candles don’t actually take regular damage, but your attacks drain their mana instead; the candle gets deactivated when its mana is down to 0%.
As the fight progresses, the candles get harder and harder to kill (initially each point of damage done by your attacks drains 5 points of the candle’s mana, but later this drops to 4, 3, 2 and finally 1), so make sure to focus enough DPS on them. The way the candles buff the boss is nonlinear (1 candle = 10%; 2 candles = 20%; 3 candles = 40%; 4 candles = 60%; 5 candles = 80%; 6 candles = 150%; 7 candles = 200%); having him buffed by 3 or so candles is tolerable enough, but at 6 candles he gets unsustainable.
Every 25%, he starts casting Reign in Blood. Trails of blood emanate from the players and start making their way towards the boss; when they reach him, he heals up a lot. To prevent him from healing up, everyone should stand near the edge of the platform as the boss comes close to 75, 50 or 25% health; then, when he actually reaches that percentage, everyone should jump off the platform. This way the blood trails will take so long to reach the boss that they won’t actually reach him in time and heal him. It’s a good idea to tank the boss near the edge when he’s close to 75, 50 or 25; he will run to the centre of the platform in preparation for his Reign in Blood Cast, and this will give you a little more time to jump down before he actually starts casting it.
P.S. Curiously, this boss was named Varl, not Vral, before the introduction of this unchained version.
P.P.S. I suspect this dungeon was developed by people with OCD CDO, because the bosses appear in proper alphabetical order 😛
Demigod of Acheron
I’m still not quite sure what is the best way of killing this boss. I’d be interested to hear how other people are killing him — let us know in the comments.
Note that when you start the fight, everyone in the group gets a Acheronian Blood Ritual Mark debuff (see the Blood for the Blood God section above for more information), and you’ll have to fight the whole fight with this debuff.
In the first phase, the boss has the following abilities:
Withering = frontal cone aoe attack, it puts a poison dot and a debuff on you (-50% damage modifier, -50% received healing modifier), much like the Unknown in the Coils of Ubah Kan. To avoid this, just move out of the frontal cone. Note that this is the first ability he will use immediately after you start the fight. When you pull him for the first time, everyone will get ported in front of the boss, so be prepared to move out of the frontal cone immediately. For later pulls, it makes sense to have everyone stand behind the boss when you start the fight.
Tail Lash = a wide cone attack that hits behind the boss and on his right side. Either move in front of the boss, on his left side, or sufficiently far away from him (the cone doesn’t go very far). My ToS was getting hit by around 10-10.5k by it. In the first phase of the fight, Tail Lash always comes immediately after the fear (see below).
Will of Acheron = targets a random player and charms him. I’m not sure if Unbinding Charm works, but in any case you should just avoid hurting the charmed player with your splash damage.
Hell Barbs = his primary single-target attack; slashing damage.
Wail of the Darkest Dark = an aoe fear; it starts when the cast begins and ends when the cast ends. A Tail Lash will come immediately afterwards, so be ready to move to the correct side of the boss.
At 50% of health, two adds (group mobs) spawn in the boss room, while the boss himself goes out and starts casting Abyssal Revival, a 30-second channeled self-heal which soon heals him back up to 100%. He then comes back and the fight resumes. In this second phase of the fight, he still has the Withering and Tail Lash abilities, but not the charm and fear. Additionally, every 28 sec or so he casts Seasons of the Abyss, which is a huge magical aoe spell that will oneshot everyone (unless they have a bubble or immunity buff). This spell also ignores line of sight. If someone survives this oneshot spell, the boss casts it again not too long afterwards, etc.
To interrupt his self-heal (Abyssal Revival) and later his one-shot ability (Seasons of the Abyss), you will need to drop barrels on him from the bridge upstairs. You might remember that there are black spots on the ground in front of the boss room, and that mobs standing on the bridge upstairs used to throw exploding barrels on you if you stood near those black spots. Actually, you probably reached that bridge yourself at some point in your walk through the dungeon (on your way from Sethik to Vral). It turns out you can click those barrels by yourself to throw them down, and if you throw them down on the boss, you interrupt whatever he’s doing at the moment; including his self-heal or his oneshot spell. The boss doesn’t have to be exactly on the black spot for this to work; a couple meters away from it is still OK. Any players close to the spot will still take damage (and be briefly stunned) when a barrel drops, so they should stay away from the black spot when a barrel is being dropped.
The boss goes to one of the spots near the entrance to the altar room before casting Abyssal Revival; it’s always the same spot, so you know exactly which barrel to drop to interrupt his heal. Then the tanks will need to move him to a new black spot so that a new barrel can be dropped on him there when he casts Seasons of the Abyss; then you move him again and get ready to interrupt the next Seasons with yet another barrel, and so on until he’s dead. Note that you still have to DPS him in the second phase; the amount of damage he takes from the barrels is fairly small.
When moving the boss around in the second phase, there are a few things you should be careful about. If you try to run too far up the walls of the room, you might fall out of his aggro list, which can be pretty bad if you’re the tank. Other people must of course be careful to avoid his tail lash and withering aoe.
When tanking the boss in the second phase, it’s IME a good idea to keep him turned so that the wall is on his right side; that way, there won’t be any players there that could get hit by Tail Lash. The DPSers can be on the boss’s left side, and the tank should be in front of him; during Withering, he can move to the DPSers for a few seconds to avoid the frontal cone of Withering.
How do you get people up on the bridge to click barrels? One possibility is to have someone waiting up there from the very start of the fight. The advantage of this is that this player can drop a barrel as soon as the boss starts casting Abyssal Revival, so he won’t heal up at all; the disadvantage is that this player is not available downstairs in the first phase of the fight. Another way to get people upstairs is to use the pink teleportation circle that appears at 50% next to the dinosaur head with which you spawned the boss. It appears that this circle starts to work only after the two adds which spawned at 50% are dead, so by the time you can port someone up and have him click the barrel, the boss will probably have healed up to 100% already.
The main problem in the second phase of the fight is the fact that increasingly large numbers of adds start spawning on the bridge upstairs and attacking any players who might be standing there, trying to click barrels. There are several possible ways of trying to cope with this:
– Perhaps the most obvious idea is to port about 3 people upstairs and hope that this will suffice to kill the adds. However, in my experience, the adds spawn in such large numbers (and have so much HP) that even 3 people get overwhelmed. And, of course, the more people you port up on the bridge, the fewer you have left downstairs to actually DPS the boss.
– Apparently some people tried leaving 3 people upstairs on the bridge from the start of the fight. The first phase must be extremely slow and hairy with just 3 people downstairs, but the advantage of this idea is that people who were on the bridge at the start of the fight don’t get the Acheronian Blood Ritual Mark debuff, so they will now find it much easier to fight the adds on the bridge. But in my experience, if they go back down at any point, they will get the debuff then and it will be stuck with them for good (until they zone out etc.).
– Another idea is to have a soldier port up about 10-15 seconds before the boss will start casting the next Seasons of the Abyss; he should just ignore the mobs, run to the correct barrel and click it. The problem is that the mobs’ attacks are very likely to interrupt his clicking of the barrel; if this goes on for too long, the boss will finish his Seasons cast and everyone will die. Using a bubble helps to prevent being interrupted, but sooner or later your bubbles will be on cooldown. After he has clicked the barrel, the soldier should jump down (try to land so that the fall is not too deep, and that you won’t drop in the area reached by Withering or Tail Lash), heal up a little, and get ready to port again in time for the next Seasons.
– Another idea is to have a soldier on the bridge all the time, kiting the adds when he isn’t clicking a barrel. This can get a bit tricky because there are so many adds eventually, but often some of them reset while they are being kited. The adds also have an annoying tendency to interrupt you while you’re clicking the barrel; you might have to CC them or use a bubble to prevent that. Note that having one soldier on the bridge all the time typically means that just one solder is available downstairs for tanking the boss; this is doable with one tank and two healers if they are well geared. This seems to be the most common way of killing this boss nowadays.
Occasionally the boss forcibly teleports one of the players from the bridge back downstairs. IIRC someone said this happens if he feels that he can’t reach the current aggro holder. In any case, you should try to avoid this because it can interfere pretty badly with your barrel-clicking efforts.
A small historical note: before 4.1.5, you could also do this fight by leaving the yellow mobs on the bridge alive, which then meant that you could get *them* to drop barrels simply by having any player move close to the black spot where you had positioned the boss. Thus you didn’t have to send players to the bridge at all. However, the yellow mobs no longer drop barrels during the Demigod fight, so you should just kill them along with all the other mobs on the bridge.
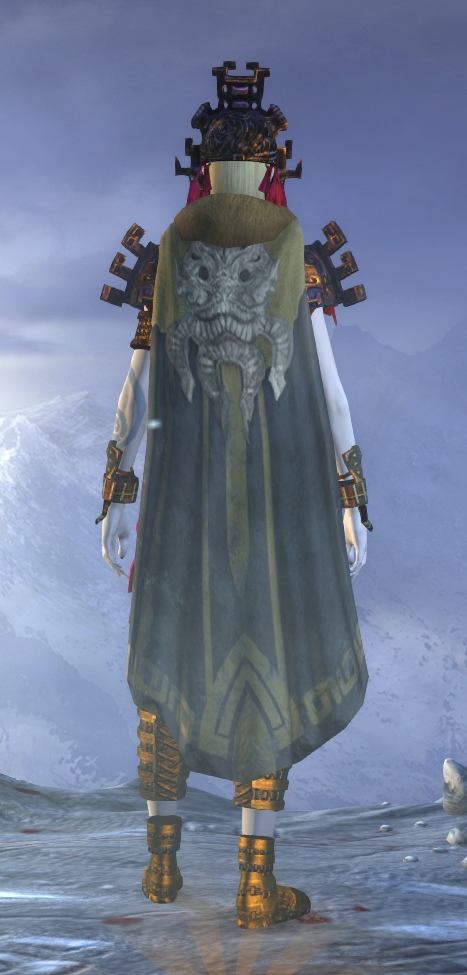
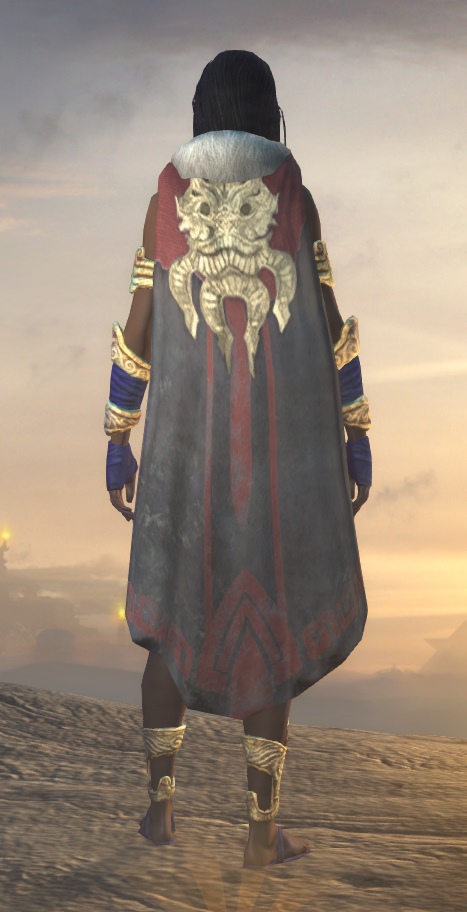
Apart from the usual Acheronian Chests, the boss drops one of four possible purple cloaks with very nice stats:
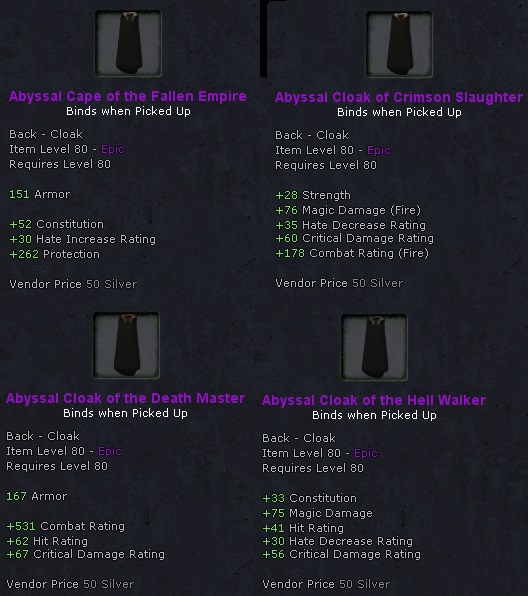
All cloaks look very similar, with small variations in color:
Abyssal Cloak of the Death Master

Abyssal Cape of the Fallen Empire

Abyssal Cloak of the Hell Walker
Abyssal Cloak of Crimson Slaughter

Not that it changes anything big, but tail lash on the demigod is only on the back and right side of the boss, his left isnt hit by it 🙂
Nice post again. 🙂 Yup, lash is right sided, its aoe is kinda weird.
Caravan normal mode is also interesting, most of the tactis are the same. Medjian goes always to 1 coffin and summons 1 skull. You also dont get debuffs in nm and there is no Demigod (at least we could not summon it). Good news is that nm bosses drop acheron armors too now in loot boxes so vanity hunters probably can get other classes’ acheron armor. Those nm armors are kinda good for new lvl80s, but lacking critigation and heal rating.
Just 2 thoughts. We found that kiting all the dogs makes it a lot easier. Basically, OT charges then MT irritates the boss and pulls him to the entrance. The OT kites all the dogs in the small room while the rest of the group is just doing a basic tank&spank.
It seems (yet to be confirmed) that if you kill the boss during his last suicide cast, you don’t get the final mark debuff. Pretty much like the ghosts in Necropolis.
The kiting idea bypasses more encounter mechanics than I’m comfortable with :} In any case, we tried kiting all the dogs at some point on testlive, I think, but found it a bit too messy for my taste.
As for the buffs from Blood for the Blood God, that’s my understanding as well (see the first section of the post).
The demigod has been fixed. The yellow mobs don’t drop the barrels on him anymore according to the patchnotes. The tactic described in this post won’t work anymore.
Depending on how many mobs there are on the bridge now you have to keep a couple of people on the bridge to handle them or, if that is not possible, you can rotate bubbleclasses to drop the barrels.
Well, yes, there isn’t much point in speculating about it at this point. Once the new version of the fight comes to the live server and I’ve taken a look at it, I’ll update my post.
how did you fight demi god in normal mode? i killed 4 bosses but demigod wasent there
I haven’t done normal mode since 4.1.4 yet, so I have no idea if the Demigod is there at all or not.
Trick to do Demigod with 2 tanks in first phase and interrupting the heal:
During first phase two tanks tanking boss both. On 55% or less HP the MT goads boss and the OT positioning himself exactly at position where the purple circle will spawn in a few seconds. If hes standing already there when boss reaches 50% he will be ported up immedeatly and can interrupt the healin from boss.
Advantage: Two tanks tanking first phase
Disadvantage: Barrelclicker has nasty debuff.
I can still summon the Prince Abaddon in Normal mode? You know how to do?
Well, you never had to do anything to “summon” him, just kill the four regular bosses and he would appear. AFAIK this no longer works in normal mode, since they basically changed the instance so that it’s as similar to the unchained version as possible (except that the mobs have less HP, hit less hard etc.). An interesting question is how to get the loot that used to drop from Abaddon – IIRC the devs said they would eventually move it to the other bosses’ loot tables, but I don’t know whether they ever got around to doing that or not.